Deformed anatomy in NSFW AI – extra limbs, fused bodies, broken joints, wrong proportions – comes from four causes: generating below native resolution, weak negatives, CFG set too high, and the wrong model. Fix it with native resolution, strong anatomy negatives, CFG 5 to 7, ControlNet OpenPose, hires fix, and ADetailer. Adult, fictional, AI generated subjects only.
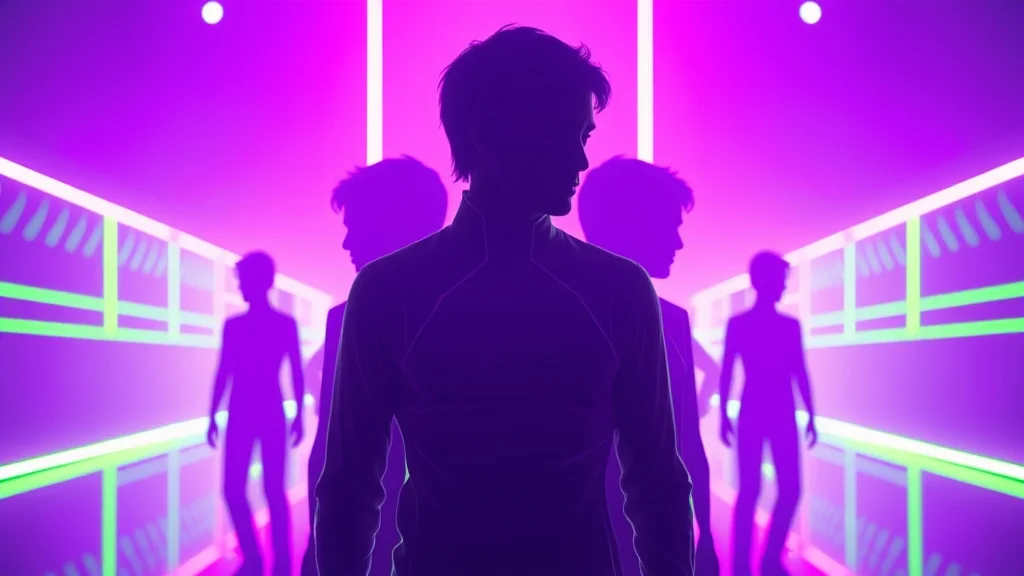
Nothing ruins a generation faster than a third arm growing out of a hip, or a torso that melts into the legs. Deformed anatomy is the number one complaint in local NSFW generation, and it feels random, but it is not. It has clear causes and a clear fix stack. Work through them in order and your hit rate climbs from a frustrating one in ten to a reliable majority.
This guide takes you from the root causes to a layered fix workflow with real settings and example prompts. Want to test fixes without a local rig first? Try a quick render in our browser generator to see clean anatomy from good settings.
Why anatomy breaks: the four root causes
Before touching settings, understand why diffusion models mangle bodies. The model does not “know” anatomy. It predicts pixels that statistically resemble its training data. When you starve it of resolution, push it with extreme CFG, give it no negative guidance, or use a model that never learned bodies well, it fills uncertain regions with plausible looking nonsense. That nonsense is your extra limb.
| Root cause | What goes wrong | The lever that fixes it |
|---|---|---|
| Resolution too low | Not enough pixels to place limbs, so they double up | Generate at native res, around 1024 |
| Weak or missing negatives | Nothing steering away from bad anatomy | Strong anatomy negative block |
| CFG too high | Model over commits to ambiguous regions | CFG 5 to 7 for most checkpoints |
| Wrong model | Checkpoint never learned good bodies | Use an anatomy strong checkpoint |
Fix 1: generate at native resolution
This is the highest impact change and the one beginners skip. SDXL, Pony, and Illustrious based checkpoints are trained around 1024 pixels on the long edge. If you generate a standing full body at 512 by 512, you are asking a 1024 trained model to compose a whole human in a quarter of the pixels it expects. It cannot, so it duplicates and fuses.
Use aspect aware native sizes. For a standing figure, 832 by 1216 or 768 by 1344 works far better than a square. For a wide scene, do not go extreme at base resolution, or you invite duplicate bodies. Generate the composition near 1024 on the short side, then enlarge with hires fix.
# Good native resolutions for SDXL / Pony / Illustrious
portrait full body: 832 x 1216
taller portrait:    768 x 1344
square:             1024 x 1024
landscape:          1216 x 832
Fix 2: build a strong anatomy negative block
Negatives steer the model away from failure modes. A weak negative like “bad” does almost nothing. A focused anatomy block does a lot. Keep it specific to limbs, joints, and proportions, and always include the baseline safety tokens.
prompt: 1woman, adult, 28 years old, fictional character, full body, standing pose,
  athletic build, natural proportions, detailed face, high detail, masterpiece, best quality
negative: child, minor, underage, loli, shota, extra limbs, extra arms, extra legs,
  fused fingers, fused limbs, missing limbs, deformed, mutated, malformed, disfigured,
  bad anatomy, bad proportions, long neck, twisted torso, broken joints
steps: 30   sampler: DPM++ 2M Karras   cfg: 6   size: 832x1216
Do not pile on a hundred negative tokens. Past a point they dilute each other and start removing things you wanted. A tight, relevant block beats a giant dump. For a curated, tested set, see our negative prompts master list.
Fix 3: tune CFG scale
CFG scale controls how hard the model follows your prompt. It feels like “more is better,” but for anatomy the opposite is true. Very high CFG, say 12 or above, forces the model to over commit to every token, including in regions where it is uncertain, and that breeds extra limbs and rigid, fried looking bodies.
For most NSFW checkpoints, keep CFG between 5 and 7. Pony based models often look best around 6 to 7. If you use a CFG rescale or a turbo or lightning variant, the optimal band shifts lower, sometimes 2 to 4. Test on a fixed seed and watch how anatomy tightens as you lower CFG.
| CFG range | Effect on anatomy | When to use |
|---|---|---|
| 2 to 4 | Loose, soft, fewer artifacts | Turbo, lightning, LCM models |
| 5 to 7 | Balanced, best for most | Standard SDXL, Pony, Illustrious |
| 8 to 11 | Tighter prompt, more artifacts | Only when prompt is being ignored |
| 12 plus | Over committed, fried, extra limbs | Avoid for anatomy |
Fix 4: pick a model that knows bodies
Settings cannot rescue a checkpoint that never learned anatomy. Some general purpose models are weak on full bodies, while purpose built NSFW checkpoints are far stronger. If you fight deformities constantly, the model may be the problem. Browse our tested picks in the best NSFW checkpoints guide and learn to load them with how to install checkpoints. On a small card, the best low VRAM checkpoints still handle anatomy well.
Fix 5: control the pose with ControlNet OpenPose
When you need a specific pose and the model keeps breaking it, stop leaving the pose to chance. ControlNet OpenPose lets you feed a skeleton that locks limb positions, so the model fills in the body around a correct frame. This is the most reliable way to kill broken joints and impossible poses, because the structure is fixed before a single pixel is painted.
Use a clean pose skeleton, set the ControlNet weight around 0.6 to 0.9, and keep the starting control step at 0. If the pose looks too rigid, lower the weight. The full setup, model downloads, and tuning live in our ControlNet guide.
# ControlNet OpenPose settings for locking anatomy
control type: OpenPose
control weight: 0.75
starting control step: 0.0
ending control step: 1.0
preprocessor: openpose_full
Fix 6: refine with hires fix
Even a clean base can soften and warp when enlarged. Hires fix regenerates at higher resolution with a controlled denoise, sharpening detail and often correcting minor anatomy slips in the process. The key is denoise strength: too low and nothing improves, too high and the model reinvents the image and adds new errors.
Set hires fix to a 1.5x to 2x upscale, denoise 0.4 to 0.5, and use an upscaler like 4x-UltraSharp or a latent upscaler. Keep steps reasonable, 15 to 20 on the hires pass is plenty. For the deep dive on upscalers and denoise tuning, read our upscaler guide.
# Hires fix settings
upscaler: 4x-UltraSharp
hires steps: 18
denoising strength: 0.45
upscale by: 1.75
Fix 7: clean up with ADetailer
ADetailer detects regions like faces and hands, masks them, and regenerates each at full resolution. This is the surgical finish for anatomy. After your base and hires pass, run an ADetailer face pass and a hand pass to repair the two hardest areas. It dramatically lifts quality without you manually masking anything.
For faces, the full method is in our ADetailer faces guide. Hands need their own dedicated approach, covered in the hands fix guide. When deformities survive every other step, hand and face passes are usually what closes the gap.
The full layered workflow
Here is the order that fixes deformed anatomy most reliably. Each layer builds on a clean one below it. Do not skip ahead.
| Layer | Action | Goal |
|---|---|---|
| 1 | Native resolution + aspect aware size | Give the model enough pixels |
| 2 | Strong anatomy negatives | Steer away from failures |
| 3 | CFG 5 to 7 | Stop over commitment |
| 4 | Right checkpoint | Start from a model that knows bodies |
| 5 | ControlNet OpenPose | Lock pose structure |
| 6 | Hires fix at 0.45 denoise | Sharpen and correct |
| 7 | ADetailer face and hand pass | Repair the hardest regions |
Get layers 1 through 4 right and most images come out clean. Add 5 through 7 for hard poses and final polish. Always work on a fixed seed while testing so each change is measurable.
Inpainting stubborn deformities
Sometimes one region stays broken: a fused hand, a leg that bends wrong. Rather than reroll the whole image, inpaint just that area. Mask the broken region, set denoise around 0.4 to 0.6, and regenerate only there with a focused prompt and the same negatives. This preserves everything you liked and fixes only what failed. Our photo editing workflow guide covers inpainting end to end, including masking, padding, and blending.
Proportions versus deformities
There is a difference between a deformity, like an extra arm, and bad proportions, like a head too large for the body. Deformities respond to negatives, resolution, and ControlNet. Proportions respond more to model choice, prompt descriptors, and CFG. If your figures are merely off in scale rather than broken, add explicit descriptors like “natural proportions” and “anatomically correct,” and consider a checkpoint with stronger realism. Stacking too many LoRAs is a common proportion wrecker, so drop LoRA weights to 0.6 to 0.8 and test.
Sampler and step count also matter for anatomy
Most guides treat samplers as a sharpness setting, but they affect anatomy too. A sampler that has not converged leaves limbs half formed and edges ambiguous, which reads as deformity. DPM++ 2M Karras at 28 to 35 steps converges cleanly and is a safe default for bodies. Euler a is fine but can stay slightly softer at low step counts. Running 12 to 15 steps to save time is a false economy when anatomy is your problem, because the model has not had enough denoising passes to resolve where a limb ends and the background begins. Give it the steps it needs before you blame the prompt.
# Anatomy friendly base sampling
sampler: DPM++ 2M Karras
steps: 32
cfg: 6
seed: fixed while testing
Regional control for complex scenes
When a scene has two or more subjects, or a subject interacting with objects, the model is far more likely to fuse bodies or grow extra limbs because it is trying to satisfy overlapping concepts in one space. Regional prompting and inpainting based composition let you assign different prompts to different areas, so each subject gets its own clean anatomy. If you keep getting merged figures in multi subject scenes, build the scene in stages: generate one clean subject, then inpaint or composite the second rather than asking the model to paint both at once. This single change removes a large class of deformities that no negative block can fix.
Verifying your fix worked
After applying changes, do not eyeball one image and call it solved. Generate a small batch of four to eight on different seeds with the same settings and count the clean results. A good anatomy setup should give you clean bodies in most of the batch, not one lucky frame. If only one in eight is clean, your base settings are still wrong and you should keep tuning resolution, CFG, and negatives before moving to post processing. Tracking your clean rate across batches is the fastest way to know whether a change actually helped or just produced one good seed by chance.
Common mistakes that keep anatomy broken
A few habits keep people stuck. The first is generating squares for full bodies, which crams a standing figure into too little vertical space and invites duplication. The second is a giant negative dump that dilutes the tokens that actually matter. The third is pushing CFG up to force the prompt, which trades prompt accuracy for fried anatomy. The fourth is skipping native resolution entirely and trying to fix everything in post. Fix the base first, then refine. You cannot inpaint your way out of a fundamentally broken composition.
If you want consistent bodies across many images of the same character, anatomy fixes pair naturally with our character consistency techniques, which keep proportions and features stable from render to render.
When realism is the goal
Photoreal NSFW work raises the anatomy bar, because the human eye catches errors in skin, joints, and proportion far more easily on a realistic image than on a stylized one. For realism, lean on a photoreal checkpoint, keep CFG modest, and always finish with a hires pass and ADetailer, because skin texture and facial structure are where realism lives or dies. Our guide on how to make realistic results, how to make realistic AI porn, pairs directly with these anatomy fixes and covers lighting and skin detail that make a correct body actually look believable. Get anatomy clean first, then layer realism on top.
Put it together
Deformed anatomy is not bad luck. It is a model being asked to compose a body without enough pixels, without guidance, or under too much pressure. Give it native resolution, a tight negative block, a sane CFG, and the right checkpoint, then lock pose with ControlNet and polish with hires fix and ADetailer. Work one layer at a time on a fixed seed and you will see exactly which change tightened the body.
Ready to try it? Open our generator, set a portrait resolution, paste a strong negative block, and generate an adult fictional character with clean proportions. Then for the toughest poses, head to the troubleshooting pillar and the related fix guides to layer in the advanced tools.
Frequently asked questions
Why does my AI keep adding extra arms and legs?
Extra limbs almost always mean the model lacks pixels or guidance. Generate at native resolution, around 1024 on the short edge, instead of 512. Add a focused anatomy negative block covering extra limbs and fused parts, and keep CFG between 5 and 7. Very high CFG forces the model to over commit to uncertain regions, which is a major cause of duplicated and fused limbs.
What resolution should I use to avoid deformed bodies?
Use the native resolution of your checkpoint, which for SDXL, Pony, and Illustrious models is around 1024 pixels on the long edge. For standing full body figures, 832 by 1216 or 768 by 1344 works much better than a square. Generate the composition near native size, then enlarge with hires fix rather than starting at a small or extreme canvas.
Does a stronger negative prompt really fix anatomy?
Yes, a focused anatomy negative block meaningfully reduces deformities by steering the model away from known failure modes like extra limbs, fused fingers, and broken joints. Keep it specific and relevant rather than dumping a hundred tokens, which dilutes the ones that matter. Always include the baseline safety tokens child, minor, underage, loli, shota in every negative line.
How does ControlNet OpenPose stop broken joints?
OpenPose feeds the model a skeleton that locks limb positions before any pixels are painted, so the body is built around a correct frame instead of being guessed. Set the control weight around 0.6 to 0.9 with the starting step at 0. This is the most reliable fix for impossible poses and twisted joints, because the structure is fixed in advance.
What is the best CFG scale for clean anatomy?
For standard SDXL, Pony, and Illustrious checkpoints, keep CFG between 5 and 7. Turbo, lightning, and LCM variants want a lower band, often 2 to 4. Avoid CFG 12 or higher for anatomy, because it forces the model to over commit and produces fried, rigid bodies with extra limbs. Test on a fixed seed and lower CFG until anatomy tightens.
Can ADetailer fix deformed anatomy?
ADetailer is excellent for repairing faces and hands, the two hardest regions, by detecting them, masking them, and regenerating each at full resolution. It will not fix a fundamentally broken full body composition on its own, so get your base image clean first with resolution, negatives, and CFG, then run ADetailer face and hand passes as the surgical finishing step.
Why are my character’s proportions off even without extra limbs?
Bad proportions, like an oversized head, come more from model choice, prompt descriptors, and stacked LoRAs than from missing negatives. Add explicit descriptors such as natural proportions and anatomically correct, drop LoRA weights to 0.6 to 0.8, and consider a checkpoint with stronger realism. Proportions and deformities are different problems and respond to different levers.
Should I fix a broken hand by rerolling the whole image?
No, inpaint only the broken region instead of rerolling everything. Mask just the failed area, set denoise around 0.4 to 0.6, and regenerate with a focused prompt and the same safety negatives. This preserves the parts you liked and repairs only what failed, which is far more efficient than discarding a good image because of one bad hand or joint.