To make 3D NSFW AI art, load Pony or a realistic SDXL checkpoint, optionally add a 3D-render LoRA, and prompt with render keywords like 3d render, octane render, subsurface scattering, cgi, and smooth shading. Tune lighting to avoid the plastic uncanny look. Keep all subjects adult, fictional, and AI-generated.
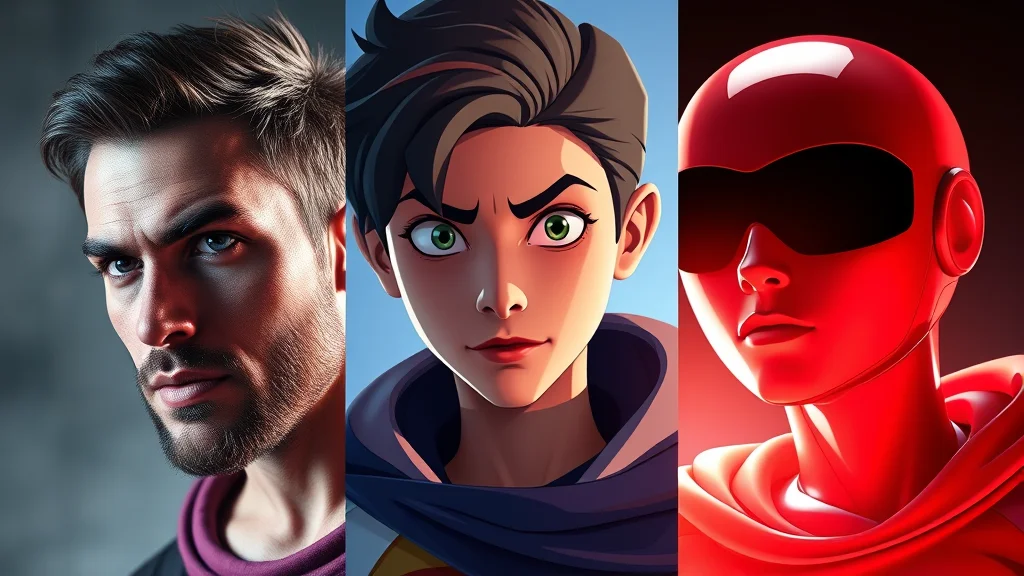
3D render is the polished middle ground between a photograph and a cartoon. Think Blender ray-traced surfaces, Daz3D character renders, or the smooth Pixar-adjacent shading you see in high-end CGI, taken into adult territory. Done well it looks expensive and clean. Done badly it lands squarely in the plastic uncanny valley, all shiny skin and dead eyes. This guide gets you the intentional glossy render and steers you clear of the accidental mannequin.
The core idea is that “3D render” is a rendering aesthetic, not a subject. You are telling the model to imitate the output of a 3D rendering engine: global illumination, subsurface scattering through skin, soft shadow falloff, and the slightly idealized geometry that CGI produces. The model already knows what an Octane or Unreal render looks like from training data. Your job is to summon that look without tipping into either photo or cartoon territory.
Best models for 3D render style
Two paths work. The first is Pony Diffusion with a 3D or render-style LoRA stacked on top. Pony has the broadest concept vocabulary and reliable anatomy, and a good 3D LoRA at weight 0.7 to 0.85 pushes it firmly into CGI territory while keeping bodies coherent. This is the most controllable route and my default recommendation.
The second path is a realistic SDXL checkpoint plus heavy render keywords. The realistic families (CyberRealistic, RealVisXL, Juggernaut) already produce believable skin, and when you add octane render, cgi, subsurface scattering they shift toward the glossy idealized look without going full cartoon. You get a hybrid that reads as a very high-end character render. Browse the best NSFW checkpoints and pick one with strong skin rendering.
If no LoRA nails the exact engine look you want (Daz vs Blender vs Unreal all differ), you can train a style LoRA on twenty to forty reference renders. For most people the keyword route gets 90 percent of the way there without training anything. Running on a small card? The low-VRAM checkpoint guide lists builds that hold render quality on 8GB.
Key prompt keywords for 3D NSFW art
The render look is driven by a tight cluster of engine and shading terms. You do not need all of them. Pick four or five that match the exact flavor you want.
| Keyword | What it does | Use weight |
|---|---|---|
| 3d render | The master trigger for CGI output | 1.0 to 1.2 |
| octane render | Adds glossy ray-traced highlights and rich light | 0.9 to 1.1 |
| subsurface scattering | Soft light through skin, kills the plastic look | 1.0 to 1.2 |
| cgi | Generic computer-graphics idealization | 0.8 to 1.0 |
| blender | Pushes toward Cycles-style soft GI | 0.8 to 1.0 |
| unreal engine | Sharper real-time game-render highlights | 0.8 to 1.0 |
| smooth shading | Clean even surfaces, no harsh photo grain | 0.9 to 1.1 |
| global illumination | Realistic bounced light, depth | 0.8 to 1.0 |
| detailed skin texture | Pores and detail to fight the mannequin look | 1.0 to 1.2 |
| ray tracing | Crisp reflections and accurate shadows | 0.8 to 1.0 |
The single most important entry here is subsurface scattering. It is the difference between skin that glows with light passing through it and skin that looks like painted plastic. Always include it, usually emphasized. Pair it with detailed skin texture so the render keeps pores and micro-detail instead of going smooth and dead.
Example prompts
Here is a clean 3D render starting point on Pony with a render LoRA. Positive then negative:
Positive: 3d render, octane render, (subsurface scattering:1.2), cgi, beautiful adult woman, mature, detailed skin texture, smooth shading, global illumination, soft studio lighting, detailed eyes, 8k, sharp focus
Negative: child, minor, underage, loli, shota, plastic skin, mannequin, dead eyes, flat lighting, cartoon, 2d, sketch, photograph, lowres, bad hands, deformed, watermark
For a sharper, game-render Unreal Engine look with stronger highlights:
Positive: 3d render, unreal engine, ray tracing, (subsurface scattering:1.1), adult woman, athletic, detailed skin, rim lighting, cinematic lighting, volumetric light, hyperdetailed, 8k
Negative: child, minor, underage, loli, shota, plastic, waxy skin, blurry, flat color, anime, cartoon, oversaturated, deformed hands, extra fingers, watermark, lowres
For a softer Blender Cycles character-render feel with gentle bounced light:
Positive: 3d render, blender, cycles, global illumination, (subsurface scattering:1.2), adult woman, soft skin texture, smooth shading, soft ambient lighting, shallow depth of field, detailed face, high detail
Negative: child, minor, underage, loli, shota, plastic skin, mannequin, harsh shadows, photo grain, cartoon, 2d, lowres, bad anatomy, extra limbs, watermark
Copy any of these into our free NSFW generator and adjust one keyword at a time so you can see exactly what each render term contributes.
Lighting and composition
Lighting is what sells a 3D render. Real rendering engines are defined by how they handle light, so your lighting tags matter as much as your engine tags. Soft studio lighting and global illumination give the clean product-render look. Rim lighting and cinematic lighting add the dramatic edge glow that high-end character art uses. Volumetric light adds god-rays and atmosphere for moodier scenes.
For composition, render style loves shallow depth of field and clean backgrounds. A simple background or studio backdrop keeps the focus on the subject and reads as a deliberate render rather than a busy photo. If you want environment, keep it simple and CGI-consistent: a rendered interior, not a photographed one. Mixing a photographed background with a rendered subject is a fast way back into the uncanny valley.
Settings matter too. For SDXL-based 3D work, a CFG of 5 to 7 keeps the render clean without over-baking contrast. Use 28 to 35 sampling steps with a DPM++ 2M Karras or Euler a sampler. Generate at 832×1216 or 896×1152 for portraits, then plan an upscale pass. Push CFG too high and the render goes crispy and plastic, which is exactly the failure mode you are trying to avoid.
Render flavors: Daz, Blender, Pixar, and game engines
Not all 3D looks are the same, and knowing the flavor you want saves a lot of trial and error. Daz3D renders read as polished figure art with smooth idealized skin and studio lighting, summoned with daz3d, 3d render, smooth shading, studio lighting. Blender Cycles reads soft and physically accurate with gentle global illumination, summoned with blender, cycles, global illumination, soft lighting. The Pixar-adjacent stylized look uses slightly exaggerated features and bright clean shading, reachable with 3d render, stylized, smooth shading, bright lighting though you must keep proportions adult. Game-engine renders from Unreal read sharper with crisp real-time highlights via unreal engine, ray tracing, rim lighting.
Pick one flavor and commit. Mixing Daz softness with Unreal sharpness gives an inconsistent render that reads as an error rather than a style. The flavor you choose also dictates lighting: soft engines want soft light, sharp engines want dramatic light. Match them and the render holds together.
Settings and workflow in ComfyUI
For repeatable 3D renders, a node workflow gives you control that a single text box cannot. In ComfyUI the reliable render recipe is: base checkpoint plus 3D LoRA, KSampler at CFG 6 and 30 steps with DPM++ 2M Karras, then a face detailer node, then a 2x upscale node at 0.35 denoise. The detailer-then-upscale order matters, because detailing first fixes the eyes before the upscale locks them in.
If you work in Automatic1111 or Forge instead, the same logic applies: generate, run ADetailer on the face, then send to the upscaler in img2img at low denoise. Keep denoise low on the upscale (0.3 to 0.4) so the upscaler sharpens the render without inventing photographic detail that breaks the CGI look. A render upscaled at high denoise drifts toward photo and loses the clean rendered surfaces you worked to create.

Avoiding the plastic uncanny failure mode
This is the section that matters most, because the line between intentional glossy render and accidental mannequin is thin. The plastic failure has three causes and three fixes.
Cause one is missing subsurface scattering. Without it, skin renders as an opaque shiny shell. Fix: always include subsurface scattering, emphasized to 1.2, and add detailed skin texture. Cause two is CFG too high. Over-guided renders bake hard speculars onto everything and the skin goes glassy. Fix: drop CFG to 5 or 6 and let the render breathe. Cause three is dead eyes and frozen expression, the classic uncanny tell. Fix: add detailed eyes, catchlights, natural expression and run a face detailer afterward.
The negative prompt does heavy lifting here. Always negate plastic skin, waxy, mannequin, dead eyes, glossy plastic. This actively pushes the render away from the failure mode. A strong negative prompt master list is worth keeping on hand because the right negations clean up render artifacts faster than any positive tag.
The last fix is post-processing. A 3D render almost always improves with a detailer pass on the face followed by an upscale. Learn how to add detail to recover skin micro-texture, then run a proper upscaler so the render holds together at full resolution. Skipping these is the most common reason a promising render looks cheap when enlarged.
Worked example: from flat to finished
Start with the base Pony render prompt above and you will likely get a clean but slightly plastic first pass. Walk it through these steps. First, bump subsurface scattering to 1.2 and add detailed skin texture if the skin reads shiny. Second, if the face looks frozen, lower CFG by one point and add natural expression, detailed eyes. Third, send the image through an ADetailer face pass in ComfyUI or your A1111 workflow to fix the eyes and sharpen the features. Fourth, upscale 2x with a model upscaler at 0.35 denoise so you keep the render look without hallucinating photo detail.
The result should read as a deliberate, high-end character render: glossy where light hits, soft where it scatters, with believable eyes and clean geometry. That is the intentional 3D look, and it is reproducible once you lock the keyword cluster and the finishing steps into a template.
Pose, composition, and scene building
A 3D render reads as deliberate when the composition feels staged like a real render shot. Render artists think in terms of camera angle, focal length, and staging, and you can borrow that vocabulary. Use dynamic angle, low angle shot, cinematic composition, full body to frame the subject like a posed character render. Shallow depth of field via depth of field, bokeh, shallow focus adds the rendered-camera feel that flat lighting alone cannot.
Scene building matters too. A bare subject on a gray background reads as a turntable test, not finished art. Add a simple but consistent rendered environment: studio backdrop, soft gradient background, rendered interior, minimal set. Keep the environment in the same render logic as the subject so the whole image reads as one coherent scene. A photographed background behind a rendered subject is the fastest way to break the illusion and slide back toward the uncanny valley.
For props and styling, render style supports clean detailed objects well, so detailed clothing, glossy material, metallic accents, smooth fabric render convincingly. CGI excels at hard surfaces and shiny materials, so lean into them where they fit the subject. This is one area where 3D outperforms photoreal, since rendering engines handle reflective and translucent materials cleanly without the artifacts a photo prompt would introduce.
Negative prompts for clean 3D renders
The negative prompt does as much for 3D render as the positive, because it actively pushes away from the failure modes. Your render negative should always block the plastic look, the wrong styles, and standard anatomy errors. A strong baseline negative for 3D work is: plastic skin, waxy skin, mannequin, dead eyes, glossy plastic, flat lighting, photograph, cartoon, anime, 2d, sketch, painting, blurry, bad hands, extra fingers, deformed, lowres, watermark. The negative prompt master list has a full toolkit you can adapt.
Note three deliberate negations. First, plastic skin and waxy skin directly counter the uncanny valley. Second, photograph keeps the render from drifting into a flat photo, and cartoon, anime, 2d keep it from sliding the other way into illustration. Third, the anatomy negatives clean up hands and fingers, which render style does not magically fix. Building these into a saved template means every 3D generation starts from a clean negative baseline.
You can also use the negative to steer the render flavor. If your Daz-style render is coming out too sharp and game-like, add harsh highlights, hard shadows to the negative to soften it. If your Unreal render is too soft, the opposite applies. Treat the negative as a steering tool, not just a cleanup list, and you gain a second axis of control over the render look.

Common mistakes
The biggest mistake is treating 3D render like a photo prompt with one render word bolted on. It needs the full lighting and shading vocabulary to commit to the look. The second is forgetting subsurface scattering and then wondering why everything looks plastic. The third is letting proportions drift. Even in render style, anchor adult woman, mature and keep child, minor, underage, loli, shota in every negative, because idealized CGI geometry can read young if you are not careful. Render style is no exception to the age rule.
The fourth mistake is skipping the upscale and detailer. Render style lives or dies on clean surfaces and sharp eyes, and both come from the finishing pass. If you want to compare the render look directly against photoreal and anime before committing your workflow, read realistic vs anime vs 3D NSFW AI art, and when you are ready, generate a 3D render free with the prompts above.
Quick-start checklist for 3D render
To get a clean 3D render fast, run through this short checklist every time. First, load Pony with a 3D LoRA at 0.75 or a realistic checkpoint with heavy render tags. Second, build the positive around 3d render, octane render, subsurface scattering, detailed skin texture, smooth shading plus your chosen engine flavor. Third, set CFG to 6 and steps to 30 on DPM++ 2M Karras. Fourth, apply the full plastic-and-style negative with the age safety tokens. Fifth, generate at an SDXL portrait ratio. Sixth, run a face detailer then a 2x upscale at low denoise.
Follow that sequence and the common failure modes simply do not appear. The plastic look is blocked by subsurface scattering plus the negative, the dead-eyes problem is fixed by the detailer, and the resolution holds through the upscale. Save the whole stack as a template so every new 3D render starts from a proven baseline rather than a blank prompt. Once the template is locked, producing a polished render is a matter of swapping the subject and pose, not rebuilding the render setup each time. Want to see it in action? Generate a 3D render free with the checklist above.
Frequently asked questions
Which model is best for 3D NSFW AI art?
Pony Diffusion with a 3D-render LoRA at weight 0.7 to 0.85 is the most controllable option, giving CGI surfaces with reliable anatomy. A realistic SDXL checkpoint plus heavy render keywords also works and produces a high-end character-render hybrid. Choose Pony if you want a dedicated render LoRA route.
What keyword stops the plastic skin look in 3D renders?
Subsurface scattering is the key term, ideally emphasized to weight 1.2 and paired with detailed skin texture. It simulates light passing through skin, which is what separates a believable render from an opaque plastic shell. Also negate plastic skin and waxy in your negative prompt.
What CFG and steps work best for 3D render style?
Use a CFG of 5 to 7 and 28 to 35 sampling steps with DPM++ 2M Karras or Euler a. High CFG bakes hard speculars and pushes the render into glassy plastic territory, which is the main uncanny failure mode. Lower CFG keeps the render clean and soft.
Do I need a LoRA for 3D render style?
Not always. Render keywords like 3d render, octane render, and subsurface scattering get most checkpoints close on their own. A LoRA helps when you want a specific engine flavor such as Daz, Blender Cycles, or Unreal, or when the base model resists the CGI look. Keywords alone reach about 90 percent.
How do I make a 3D render look like Blender versus Unreal?
Blender Cycles reads soft and diffuse, so use blender, cycles, global illumination, and soft ambient lighting. Unreal Engine reads sharper with crisp highlights, so use unreal engine, ray tracing, and rim lighting. The lighting tags do as much as the engine name to define the flavor.
Why do my 3D renders have dead, frozen eyes?
Dead eyes are a classic uncanny tell. Add detailed eyes, catchlights, and natural expression to the positive prompt, then run an ADetailer face pass afterward. The detailer regenerates the eyes at high resolution and fixes the frozen-mannequin look that ruins otherwise good renders.
Can stylized 3D renders accidentally look underage?
Yes, idealized CGI geometry can read young if you are careless. Always anchor adult woman and mature in the positive prompt and keep child, minor, underage, loli, and shota in every negative. The age rule applies to render style exactly as it does to every other style.
Should I upscale 3D render images?
Always. Render style depends on clean surfaces and sharp eyes, both of which come from finishing. Run a face detailer, then upscale 2x at around 0.35 denoise so you keep the render aesthetic without hallucinating photographic detail. Skipping this makes renders look cheap when enlarged.