Get low key by lighting one thing and letting everything else fall to black. On a realism checkpoint, prompt low key lighting, single light source, dramatic shadow, chiaroscuro, deep blacks, mostly shadow, dark background, rim of light on skin. The subject sits in a pool of light surrounded by darkness, not an evenly lit room.
Low key is subtraction. Most lighting recipes add light until the subject is clearly visible everywhere. Low key does the opposite: it commits to a single source, lets two-thirds of the frame collapse into deep black, and reveals only the sliver of the adult subject that the light touches. Done right it is the most dramatic look you can prompt. Done wrong it turns into a muddy gray mess or, worse, a normally lit photo that just happens to have a dark wall behind it.
What the low key look actually is
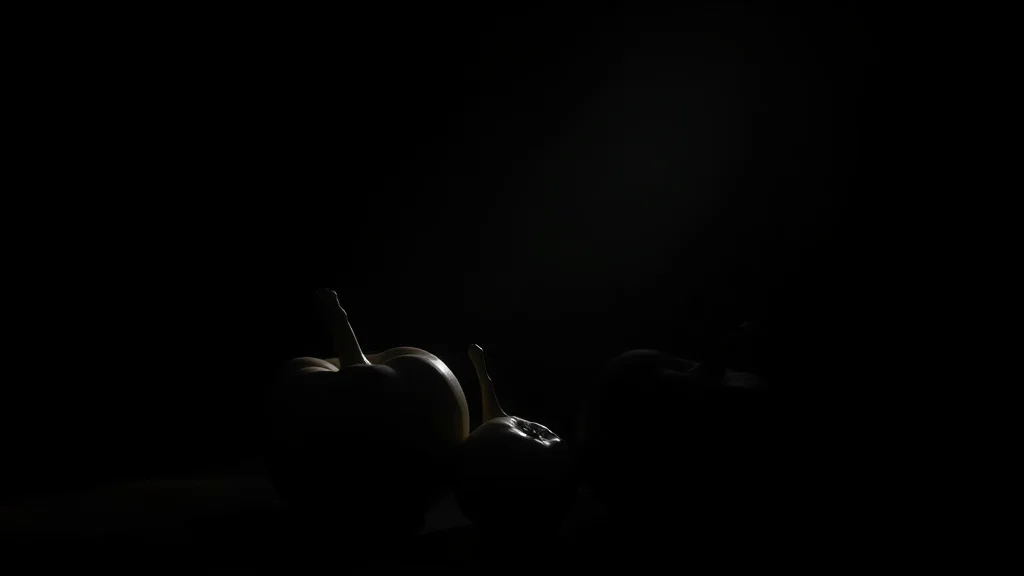
Low key photography means most of the tones sit at the dark end of the scale. A single hard light (a bare bulb, a window slit, a lamp) carves the subject out of blackness. The shadows are not filled, so they go pure black, not gray. This is chiaroscuro, the old painting technique of strong light-to-dark contrast, applied to a body.
Two traits define it and separate it from a dark studio shot:
- One dominant light source, hard and directional, with no fill light.
- True deep blacks in the shadows, not lifted muddy gray.
This is a different target from studio flash, where multiple lights wrap the subject in even, bright exposure. The sibling guide on studio flash NSFW AI photos is the bright, clean opposite of this recipe. Low key is one lamp in a dark room. If you find yourself adding a second light or a softbox, you have left low key and wandered into studio territory.
Every human example here is an adult, fictional and original, never a real identifiable person.
The ratio that makes or breaks it
Photographers describe low key by lighting ratio, the difference in brightness between the lit side and the shadow side. In a normal portrait that ratio might be gentle, maybe two stops, so shadows are soft and detailed. Low key runs a brutal ratio, four or more stops, so the shadow side receives almost no light and goes to black. When you prompt an AI, you cannot set a literal ratio, but you can push the model toward that extreme with paired tags: one set that describes an intense, hard key on part of the body, and another that insists the rest is pure black. The mistake beginners make is prompting only one half of that pair. They ask for dramatic shadow but forget to demand a strong highlight, and the model gives them a uniformly dim, flat image. Or they ask for a spotlight but do not kill the background, and they get a well-lit subject in a slightly dark room. You need both halves, the bright anchor and the deep black, in the same prompt, every time. Hold that idea while you read the tag block, because it is the difference between a photo that looks intentionally dramatic and one that just looks underexposed.
Best checkpoints and LoRAs for low key
You need a model that renders skin with real tonal range and does not auto-brighten shadows. Some checkpoints aggressively lift dark areas, which flattens the drama you are after.
| Model | Base | Why it fits low key |
|---|---|---|
| RealVisXL V5 | SDXL | Excellent tonal range and contrast control. Holds deep blacks without lifting them to gray. |
| epiCRealism | SD 1.5 | Renders warm skin that glows convincingly under a single hard light. |
| Pony Realism | SDXL Pony | Strong NSFW anatomy plus a moody default that suits dramatic shadow. |
| CyberRealistic Pony | SDXL Pony | Natural skin that takes hard side light without turning plastic. |
Avoid checkpoints tuned for bright, airy portraits, they will fight you at every step. A moody or cinematic LoRA at 0.3 to 0.5 can deepen the effect, but the tags below already push hard toward darkness. For picking a strong SDXL base, the RealVisXL NSFW guide and the Pony Realism NSFW guide both dig into skin rendering under contrast.
Skin rendering matters more in low key than in almost any other look, because the small lit area is the entire image. Every pore, every specular highlight on the shoulder or collarbone is doing the work that a fully lit body would spread across the whole frame. That is why a checkpoint with weak skin detail falls apart here even though it might pass in a bright scene: there is nowhere for a soft, plastic render to hide. Test your chosen base by generating a simple side-lit portrait and zooming into the lit cheek. If the skin holds micro-detail and a believable sheen, the model is a keeper for dramatic work. If it smears into wax, switch bases before you invest in a full session, because no amount of prompt tuning will add detail the checkpoint cannot render.
The prompt: camera, lens, and light tags
Lead with the lighting philosophy, then the direction, then the darkness. The order signals to the model that light is the subject.
low key lighting, single light source, hard directional light,
dramatic chiaroscuro, deep black shadows, mostly in shadow,
beautiful adult woman lit from one side, rim of light on skin,
strong side light, spotlight, dark background, black background,
moody, cinematic, high contrast, film noir lighting,
shadow across face, sculpted highlights, intimate dark room
Notes on the tags:
single light sourceandhard directional lightprevent the model from adding fill. This is the heart of the look.deep black shadowsandmostly in shadowpush tones down. Without them the model defaults to a comfortably lit exposure.rim of light on skinandsculpted highlightsdescribe how the light kisses only the edge of the body, the signature low-key reveal.dark background, black backgroundstops the model from rendering a bright wall behind the subject.
To fine-tune the light direction (side, rembrandt, split), the NSFW AI lighting prompts bank has directional phrasing that slots straight in. For the emotional register, NSFW AI mood and atmosphere prompts helps you steer between menacing, sensual, and melancholy dark.
Negative prompt
Here you remove everything that lifts shadows or flattens contrast. Bright and even are the enemies.
bright lighting, flat lighting, even lighting, high key, overexposed,
soft light, fill light, studio softbox, washed out, low contrast,
gray shadows, muddy, hazy, foggy, bright background, white background,
daylight, HDR, flat, dull, deformed hands, extra fingers,
bad anatomy, blurry, watermark, text
The critical entries are flat lighting, even lighting, high key, fill light, and gray shadows. Muddy gray is the number one low-key failure, so explicitly negating gray shadows, muddy, and low contrast does real work. See the NSFW AI negative prompts master list for how to weight these.
Settings: sampler, CFG, steps, resolution
Low key rewards slightly higher CFG than most looks because you want contrast, but do not overdo it or the blacks clip into blocky artifacts.
| Setting | Value | Why |
|---|---|---|
| Sampler | DPM++ 2M Karras | Handles smooth shadow gradients without banding. |
| CFG scale | 6 to 8 | Higher CFG strengthens contrast and holds the deep blacks. |
| Steps | 28 to 35 | Shadow detail and skin highlights need steps to resolve cleanly. |
| Resolution | 832×1216 portrait | Vertical framing suits a single figure in darkness. |
| Hires fix | 1.5x, denoise 0.3 | Recovers skin highlight detail without lifting the blacks. |
| Clip skip | 2 (Pony/SDXL anime bases) | Standard for the Pony family, sharper edges in shadow. |
If your blacks are banding into visible steps, that is a sampler or bit-depth issue, not a prompt one. Nudge steps up and keep the hires denoise moderate. For a deeper tuning reference, the NSFW AI CFG and sampler settings guide covers contrast-heavy scenes.
Step-by-step workflow
- Load a high-contrast realism checkpoint. Set a portrait resolution like 832×1216.
- Paste the positive block, swapping in your adult character. Keep the light direction consistent, pick one side and commit.
- Paste the negative block. Confirm high key, flat lighting, and gray shadows are all negated.
- Set CFG to 7, DPM++ 2M Karras, 30 steps.
- Generate a batch of 6. Low key is high variance, some frames will over-darken the face into nothing, others will nail the reveal.
- Cherry-pick the frame where the light sculpts the body but the eyes and key features are still readable. That balance is the whole game.
- Run ADetailer for NSFW on the face, but keep denoise around 0.3 so it does not brighten the shadowed half of the face.
- If a specific area is too dark, use targeted NSFW inpainting to lift just that region rather than re-lighting the whole frame.
Where low key breaks, and the fix
The two classic failures are muddy gray (not dark enough, and flat) and a blacked-out subject (too dark to read). Both come from the light-to-dark balance being off.
| Problem | Cause | Fix |
|---|---|---|
| Muddy gray instead of deep black | CFG too low, shadows lifted | Raise CFG to 7 or 8, add deep black shadows and negate gray shadows, muddy |
| Whole frame too dark, subject lost | No highlight anchor | Add rim of light on skin, sculpted highlights, spotlight on subject |
| Evenly lit, no drama | Fill light leaked in | Strengthen single light source, hard directional light, negate fill light, even lighting |
| Bright background behind subject | Background tag ignored | Push black background, dark room earlier and add to it in the prompt |
| Face fully black, unreadable | Light aimed away from face | Specify lit from one side facing subject, or rim light on face |
| Blocky banding in shadows | Steps too low | Raise steps to 32 plus, keep hires denoise near 0.3 |
| Skin looks flat and lifeless | Contrast washed out | Add high contrast, cinematic, and remove any soft light tags |
If the overall image reads flat and hazy no matter what, that is usually a contrast problem the how to get better NSFW AI results guide addresses at the settings level. Low key lives or dies on contrast, so treat any haziness as a bug to eliminate.
Choosing your single light direction
Low key is not one look, it is a family, and the direction of your single source changes the whole mood. Committing to a named lighting pattern gives the model a clearer target than the generic “dramatic shadow,” which it can interpret a dozen ways.
| Light pattern | Prompt phrasing | Feel |
|---|---|---|
| Split light | split lighting, half face in shadow, hard side light |
Tense, confrontational, half the body lit |
| Rembrandt | rembrandt lighting, small triangle of light on cheek, 45 degree key |
Classic, painterly, sculpted |
| Rim only | rim light only, edge light, body outlined against black, silhouette with detail |
Sensual, mysterious, minimal reveal |
| Underlit | light from below, uplighting, dramatic under-shadow |
Uneasy, theatrical, sculptural |
| Hard top | top light, light from above, deep eye shadows, sculpted collarbones |
Cold, dramatic, downcast |
Split lighting is the easiest to get right because the divide between lit and unlit is obvious and the model handles it well. Rim-only is the hardest and the most striking: you are asking for almost nothing to be lit, just a bright edge tracing the body against black, so it takes more batching to land a frame where enough detail survives to be readable. Pick the pattern that matches your intended mood before you write a single other tag. A rembrandt low-key portrait and a rim-lit low-key nude are built from the same philosophy but read as completely different photographs. Once you know which one you want, the rest of the prompt falls into place around that single decision.
When to level up
Once a single low-key frame lands, push the storytelling. Dramatic light pairs naturally with color. A cold blue key over deep black feels tense, a warm amber key feels intimate. The NSFW AI color grading prompts guide shows how to tint the single source without lifting the shadows.
The next level is precise light shaping. If you want the beam of light to hit an exact part of the body, ControlNet for NSFW lets you drive the composition and, with a depth or scribble map, guide where the highlight falls. That is how you go from a lucky dramatic frame to a repeatable, directed look.
A third upgrade path is post-processing the contrast rather than fighting for it at generation time. Even a strong low-key render can be pushed further in an editor by deepening the blacks with a curves adjustment and adding a touch of clarity to the lit skin. This is safer than cranking CFG to 9 or 10, which tends to introduce artifacts in the highlights. Generate at a sane CFG of 7, get a frame that is 80 percent of the way there, then finish the last 20 percent with a black-point lift and a subtle vignette in post. The NSFW AI photo editing workflow guide walks through a contrast pass that suits dark, dramatic frames without crushing so hard you lose the skin texture you worked to keep. Treat generation and grading as two stages of one pipeline rather than trying to win the whole battle in the prompt.
Nail the one-light, deep-black, readable-subject balance first. Everything else, color, precise beams, matching sets, builds on that single decision to light one thing and let the rest disappear.
Frequently asked questions
Why do my low key AI photos look muddy gray instead of black?
Your CFG is too low and the model is lifting the shadows. Raise CFG to 7 or 8, add deep black shadows and high contrast to the positive, and explicitly negate gray shadows, muddy, and low contrast. Muddy gray is the number one low-key failure and it is almost always a contrast problem.
How do I stop the whole image from going too dark?
Add a highlight anchor. Prompt rim of light on skin, sculpted highlights, and spotlight on subject so the light clearly reveals part of the body. Low key needs one bright sliver against the black. Without a highlight tag the model over-darkens and loses the subject entirely.
What is the difference between low key and studio flash?
Low key uses a single hard light with no fill, so most of the frame falls to deep black. Studio flash uses multiple lights that wrap the subject in bright, even exposure. They are opposites. If you add a second light or a softbox you have left low key.
What CFG works best for low key lighting?
6 to 8. Higher CFG strengthens contrast and holds the deep blacks that define the look, unlike most realism recipes that want low CFG. Do not exceed 8 or the blacks can clip into blocky banding artifacts.
How do I keep the face readable when half of it is in shadow?
Cherry-pick from a batch for frames where the eyes still catch light, then run ADetailer at a moderate denoise around 0.3 so it does not brighten the shadowed half. If one area is too dark, inpaint just that region rather than re-lighting the entire frame.
Which checkpoint holds deep blacks best?
RealVisXL V5 has excellent tonal range and does not auto-lift shadows to gray. Pony Realism and CyberRealistic Pony also handle hard side light well. Avoid checkpoints tuned for bright, airy portraits because they fight the dark aesthetic at every step.
Why are my shadows banding into visible steps?
That is a sampler and step-count issue, not a prompt one. Raise steps to 32 or more and keep your hires-fix denoise moderate around 0.3. Smooth shadow gradients need enough steps to resolve without stair-stepping.
Can I control exactly where the light hits the body?
Yes, with ControlNet. Using a depth or scribble map you can guide where the highlight falls, turning a lucky dramatic frame into a repeatable directed look. Color grading prompts let you tint that single source cold or warm without lifting the shadows.
Related scene how-tos: