Piercing and jewelry prompts add adult body-mod detail and metal accessories, but small shiny objects are where diffusion melts, floats, and doubles the most. Name the piercing or jewelry type plainly, pick a metal, weight small items down rather than up, and clean the survivors with inpainting and ADetailer. This bank covers ear, septum, nose, navel, nipple, and lip piercings plus necklaces, chokers, earrings, and body chains.
Jewelry is high risk, high reward. A choker, a septum ring, and a delicate body chain instantly make a render feel styled and specific. But metal is the single most artifact-prone thing you can prompt: earrings go asymmetric, chains merge into skin, rings blob into melted lumps, and a floating necklace hovers off the collarbone. This guide gives you the tag bank and, more importantly, the repair workflow that makes small metal read clean. All subjects described here are adult, fictional characters, and piercings are treated as ordinary adult body modification, described plainly by type and location so the model has a clear, unambiguous target to render.
What piercing and jewelry prompts control and why they matter
All subjects here are adults, and piercings are treated as ordinary adult body modification. Two levers plus a material choice:
- Piercings sit at fixed anatomical points (ear, septum, nose, navel, lip). They are small, so they get lost or duplicated easily.
- Jewelry drapes or wraps (necklace, choker, body chain, bracelet). Draping items float or clip through skin when the model misjudges depth.
- Material (gold, silver, gemstone) sets the specular behavior and color of every metal surface.
The recurring problem is scale. Piercings and fine chains are tiny relative to the frame, so the model has few pixels to describe them, which is where melting and doubling come from. The counterintuitive fix is often to weight these tags down, not up, so the model does not over-invent metal. Weighting technique is in the prompt weighting guide, and these accessories layer on top of your outfit prompts rather than replacing them.
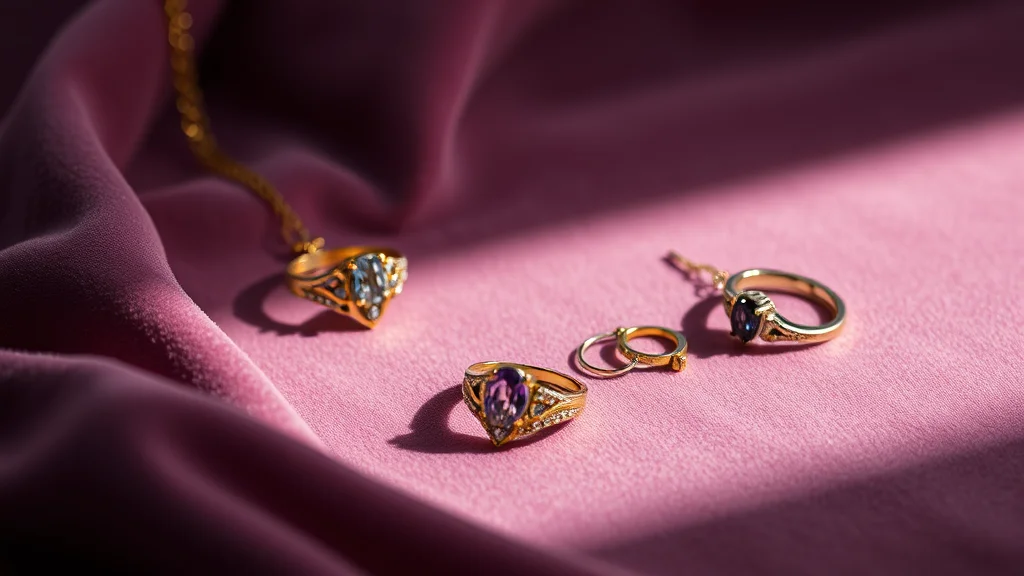
Copy-paste piercing and jewelry tag bank
Piercings (adult body modification)
ear piercing, multiple ear piercings, helix piercing, industrial piercing, septum piercing, nose ring, nose stud, nostril piercing, eyebrow piercing, lip piercing, labret piercing, snake bites, medusa piercing, navel piercing, belly button piercing, nipple piercing, nipple rings, tongue piercing
Necklaces and neckwear
necklace, choker, velvet choker, lace choker, collar, pendant necklace, layered necklaces, pearl necklace, chain necklace, locket
Earrings
earrings, stud earrings, hoop earrings, large hoop earrings, dangling earrings, drop earrings, chandelier earrings, ear cuff
Body and hand jewelry
body chain, belly chain, waist chain, harness necklace, bracelet, bangles, cuff bracelet, rings, stacked rings, anklet, armlet, arm cuff, nipple chain
Material and finish
gold jewelry, silver jewelry, rose gold jewelry, platinum jewelry, gemstone, diamond, emerald, ruby, sapphire, pearl, crystal, polished metal, delicate jewelry, dainty jewelry
A useful way to think about this bank is in three tiers of risk. Neckwear and single earrings are relatively safe, since a choker or a stud pair is a small, contained shape. Multiple small piercings and stacked rings are medium risk, because repetition invites the model to lose count. Long draping chains, body chains, and fine gemstone settings are high risk, since they combine small scale, symmetry, and heavy specular reflection all at once. Plan your prompt around that: lead with the safe focal piece, add medium risk items sparingly, and treat every high risk piece as something you will finish by hand with an inpaint pass rather than expect perfect from the base render.
Reference grid: item to fix strategy to notes
| Item | Common failure | Fix strategy | Notes |
|---|---|---|---|
| Earrings | Asymmetric or mismatched pair | ADetailer on face, then inpaint one side | Face jewelry benefits most from a face pass |
| Septum / nose ring | Doubled or misplaced | Weight down, inpaint the nose | Keep the tag simple, one ring |
| Necklace / choker | Floats off the neck | Inpaint the collarbone join | Chokers sit tighter, fail less than long chains |
| Body chain | Merges into skin | Negative merging tags, hires fix | Delicate chains need resolution to resolve |
| Rings | Melted or fused fingers | Weight down, fix hands first | Solve hand shape before adding rings |
| Nipple piercing | Blobby or duplicated | Inpaint at moderate denoise | Small area, low pixel budget, inpaint it |
Full example prompts
Positive (realistic, layered jewelry):
photorealistic photo of an adult woman, (silver septum piercing:0.9), multiple ear piercings, (delicate gold necklace:1.0), velvet choker, small hoop earrings, detailed skin texture, soft studio light, high detail, 85mm, shallow depth of field
Negative:
melted jewelry, blobby metal, floating jewelry, asymmetric earrings, chain merging into skin, extra earrings, doubled piercing, deformed, blurry, low detail
For a bold body-chain look:
Positive:
photorealistic photo of an adult woman, (gold body chain:1.05), belly chain, navel piercing, layered necklaces, gemstone pendant, warm rim light, detailed metal, polished metal, high detail
Negative:
melted chain, chain fused to skin, floating chain, extra chains, tangled metal, deformed, blurry
Notice the piercing tags are weighted at or below 1.0. Pushing small metal above 1.1 tends to multiply it, which is the opposite of what you want.
Common failure modes and the fix
Melted or blobby metal
Rings and pendants turn into shapeless lumps. Fix: weight the item down ((rings:0.9)), run hires fix so the metal has pixels to resolve, and add melted jewelry, blobby metal to the negative. Then inpaint the item at moderate denoise for crisp edges.
Floating jewelry
A necklace hovers a centimeter off the skin, a chain sits in mid air. Fix: inpaint the contact points so the jewelry meets the body, and add floating jewelry to the negative. Chokers and tight items float less than long draping chains, so prefer them when you can.
Asymmetric or extra earrings
Two different earrings, or three on one ear. Fix: run ADetailer on the face so both ears re-render at high resolution, then inpaint to match the pair. Face jewelry is exactly what a face detail pass is for.
Chains merging into skin
A body chain disappears into the torso as if painted on. Fix: add chain merging into skin, chain fused to skin to the negative, raise resolution, and inpaint the sections that sank. Delicate chains simply need more pixels than the base render gives them.
Doubled or misplaced piercings
One septum ring becomes two, or a nose stud lands on the cheek. Fix: keep the tag simple and singular, weight it down, and inpaint the exact anatomical point. The full paste-ready block of anti-artifact negatives is in the inpainting guide worked examples.
Rings ruin the hands
Adding rings makes fingers fuse or bend wrong. Fix: get the hand shape right first, then add rings by inpainting onto correct fingers. Do not ask the base render to solve hands and rings at once.
Keeping jewelry consistent across a set
For a subject who wears the same pieces across a set:
Lock the accessory tag block and materials. Same items, same metal, same order every frame. If frame one is silver septum piercing, velvet choker, small hoop earrings, every frame matches. Mixing gold and silver across frames breaks the illusion of one shoot.
Inpaint signature pieces from a reference. A distinctive pendant or body chain will vary seed to seed, so inpaint it from the same source image into each frame, the same way you would lock a tattoo. Pair with the methods in character consistency techniques.
Keep piercings positional. Describe piercings by exact location every time (septum, left nostril, navel) so they do not wander. For the full multi image workflow that ties poses, jewelry, and lighting together, follow how to make a consistent NSFW AI photo set.
The guiding principle for all metal: describe less, weight down, and repair after. Over-prompting jewelry is what multiplies and melts it.
Why metal is the hardest thing to render
It helps to know why jewelry fails so reliably, because the reasons point straight to the fixes. Metal is small, specular, and often symmetrical or repeated, and each of those is a diffusion weak spot on its own. Combined, they make jewelry the single most artifact prone element you can prompt.
Small means low pixel budget. A pair of stud earrings might occupy a few dozen pixels in a portrait, which is not enough for the model to describe two matching objects, so they drift apart or blob together. Specular means the model has to invent believable reflections, and metal reflections are complex, so at low resolution it fudges them into shapeless shine. Symmetry and repetition, like a matching pair of earrings or a row of chain links, ask the model to reproduce the same object multiple times, which is exactly what it is bad at, so you get mismatched pairs and chains that change thickness along their length. Every fix in this guide (weight down, raise resolution, inpaint, run a face pass) is really just a way to give the model more room or fewer objects to get wrong.
Resolution and the face pass are your best friends
Because most jewelry problems are pixel budget problems, two settings solve more of them than any prompt change. First, resolution. Run hires fix at 1.5x or 2x so fine chains, small studs, and reflective surfaces have enough pixels to resolve into actual objects instead of shine. A body chain that melts into the skin at base resolution often renders cleanly at 2x with no other change. The tradeoffs of these upscaling settings are covered in the CFG and sampler settings guide.
Second, the face pass. Earrings, septum rings, nose studs, and lip jewelry all live in the face region, which is exactly what ADetailer re-renders at high resolution. Running a face detailer with your jewelry tags repeated in its prompt fixes the majority of asymmetric earring and doubled piercing problems automatically, before you ever open the inpaint tab. Make it a default step for any render with face jewelry and you will inpaint far less.
Layering jewelry without visual clutter
Stacking pieces (layered necklaces, stacked rings, multiple ear piercings) looks great when it works and becomes a tangled mess when it does not, because every added piece is another small metal object competing for the same limited attention. The trick is to layer deliberately rather than dumping every accessory into one prompt.
Pick a focal piece and supporting pieces. If a bold harness necklace is the star, keep the earrings small and simple so they do not fight it. If the earrings are chandelier earrings, keep the neckline clean. Naming a single metal (gold jewelry throughout, not gold necklace plus silver rings) also reduces clutter, because the model does not have to track two materials at once, and a matched metal reads as an intentional styled set. These accessory choices layer directly onto your outfit prompts and pair naturally with tattoo prompts for a full body-mod look. When in doubt, use fewer pieces at higher quality, since three clean accessories beat six melted ones every time.
Material and finish: gold, silver, and gemstones
The material tag sets both the color and the reflective behavior of every piece, and choosing it deliberately is what makes metal look like jewelry rather than gray blobs. Gold reads warm and holds up well because its color gives the model a clear target even at small sizes. Silver and platinum are cooler and slightly harder to render cleanly, because they rely more on reflection than color, so they benefit most from good lighting and higher resolution. Rose gold sits between the two and reads as soft and modern.
Gemstones add color points that catch the eye, but they are tiny and highly specular, so they melt easily. Name the stone (diamond, emerald, ruby, sapphire, pearl) and keep the setting simple, then inpaint the stone if it blobs. Pearls are the friendliest gem to render because they are matte and rounded rather than faceted and sparkly, so a pearl necklace holds shape far better than a diamond one. Use polished metal for a bright reflective finish and dainty jewelry or delicate jewelry to signal thin, fine pieces, though remember that delicate also means small, which means more pixels needed to render it well. As with fabric and skin, the material only reads correctly when your lighting supports it, since all of this metal depends on specular highlights to look real. Tie the metal tones to your overall palette with the color grading prompts bank so gold stays gold across a whole set.
A jewelry render checklist
Before accepting a render with jewelry, run five checks. One, compare the two earrings, they should be a matching pair, not two different designs. Two, count piercings at each site, a single septum ring should not have become two. Three, follow every chain and necklace to confirm it rests on the skin rather than floating or sinking into it. Four, inspect rings and pendants for melting or fused fingers. Five, confirm all metal is one consistent color unless you deliberately mixed materials. Each failure is a targeted fix: a face pass or inpaint for earrings and piercings, an inpaint of the contact points for floating or merged chains, and a hand fix before rings. Building this five point pass into your workflow means jewelry stops being the thing that quietly ruins otherwise good images.
Where to go next
Jewelry is the finishing layer over everything else. Combine it with outfit prompts and lingerie prompts for the full styled look, tattoo prompts for the rest of the body-mod set, and makeup prompts so the face reads intentional alongside the earrings and studs.
Frequently asked questions
Why does my AI jewelry come out melted or blobby?
Small metal objects get very few pixels in the base render, so the model approximates them as lumps. Weight the item down toward 0.9, run hires fix so it has resolution to resolve, and add melted jewelry and blobby metal to your negative. Finish with an inpaint pass for crisp edges.
Should I weight piercing and jewelry tags up or down?
Down, usually. Pushing small metal above about 1.1 makes the model over-invent it, which multiplies earrings and doubles piercings. Keep these tags at or below 1.0 and repair with inpainting instead of forcing them with weight.
How do I stop a necklace from floating off the neck?
Inpaint the contact points so the jewelry actually meets the skin, and add floating jewelry to your negative. Tight items like chokers float far less than long draping chains, so prefer a choker when you want reliable placement without heavy cleanup.
Why are my earrings mismatched or asymmetric?
Diffusion handles each ear semi-independently at low resolution, so they drift apart. Run ADetailer on the face to re-render both ears at high resolution, then inpaint one side to match the other. Face jewelry is exactly the case a face detail pass is built for.
How do I fix a body chain that merges into the skin?
Add chain merging into skin and chain fused to skin to the negative, raise the resolution, and inpaint the sections that sank into the torso. Delicate chains need more pixels than the base render provides, so resolution plus a targeted inpaint is the reliable fix.
Are piercing prompts allowed, and how should I describe them?
Yes, piercings on adult subjects are ordinary body modification. Describe the type and location plainly, such as septum piercing or navel piercing, keep the tag singular so it does not double, and inpaint the exact anatomical point if it lands wrong.
Why do rings mess up the hands when I add them?
Asking the base render to solve hand shape and ring detail at the same time overloads it, so fingers fuse or bend. Get the hand right first, then add rings by inpainting them onto correct fingers rather than prompting everything at once.
How do I keep the same jewelry across a whole photo set?
Lock the accessory tag block and metal, using the same items in the same order and one consistent metal color every frame. For a distinctive signature piece, inpaint it from the same reference image into each frame, the same way you would lock a specific tattoo across a set.