To get the golden hour look, do not just make the color warm. Add directional low-sun tags (golden hour, warm backlight, sun flare, rim light, hazy glow, long shadows), place the sun behind or beside your adult subject, keep CFG low, and keep skin from turning orange. Golden hour is about the direction of light, not a warm filter.
What golden hour actually is
Golden hour is the hour after sunrise or before sunset when the sun sits low, the light travels through more atmosphere, and everything turns warm and soft. The defining traits are direction and quality, not just color. The light rakes in from a low angle, so shadows stretch long. It usually comes from behind or the side of the subject, creating a bright rim around hair and shoulders. There is often a hazy glow or lens flare, and the shadows stay soft and open rather than hard and black.
The common AI mistake is treating golden hour as “warm color” and cranking orange saturation. That gives you a flat, evenly lit frame with an Instagram filter slapped on, which fools nobody. Two symptoms follow: orange-tinted skin, where the subject looks sunburned or fake-tanned because the model tinted the skin instead of the light, and flat, dull light with no rim and no direction, which is just a warm gray day. Real golden hour has a clear light direction, a rim, and a glow that sits on top of correct skin tone. If your baseline realism is shaky, fix that first with the realism results guide, then layer this light on top.
Every subject is a fictional adult woman or adult man. Golden hour is a lighting recipe, not a way to depict a real, identifiable person.
Best checkpoints and LoRAs for golden hour
You want a checkpoint that handles colored light and rim separation well. Models with strong lighting response render the backlight rim; weaker ones just tint everything.
| Model | Base | Why it suits golden hour |
|---|---|---|
| epiCRealism | SDXL | Natural warm skin under colored light, no orange cast |
| RealVisXL V5 | SDXL | Renders true rim light and sun flare cleanly |
| Juggernaut XL | SDXL | Strong atmospheric haze and glow |
| Lustify SDXL | SDXL | Holds skin realism under heavy backlight |
| FLUX.1 dev | FLUX | Best light physics for flare and rim, slower |
A “cinematic lighting” or “rim light” LoRA at 0.3 to 0.4 weight strengthens the backlit edge if a checkpoint keeps flattening it. The epiCRealism guide covers how it handles warm skin without over-tinting, which is the exact problem golden hour exposes.
The prompt: sun direction, rim, and glow tags
Golden hour needs three tag groups: the sun and its direction, the rim it creates, and the atmospheric glow. Warm color is a consequence, not the instruction.
photograph of an adult woman at golden hour, low sun behind subject,
warm backlight, rim light on hair and shoulders, sun flare, lens flare,
hazy glow, long soft shadows, warm sunlight, atmospheric haze,
sidelit face, natural skin, shot on DSLR, 85mm, high detail, cinematic
low sun behind subject and warm backlight set the direction, which is the whole point. rim light on hair and shoulders forces the bright separating edge that says the sun is behind them. sun flare, hazy glow, atmospheric haze add the soft bloom that low-angle light creates as it scatters. sidelit face keeps the front of the face readable so the subject is not a silhouette. Notice that “warm” appears only once and late: you want warm light, not warm skin. The lighting prompt guide, the color grading guide, and the mood and atmosphere guide go deeper on separating light color from skin tone. For a harder, more graphic version of backlight, compare the backlit sibling.
Negative prompt
The negative’s main job is stopping orange skin and flat light.
orange skin, sunburned, fake tan, oversaturated orange, monochrome orange,
flat lighting, no shadows, dull, overcast, harsh midday sun,
plastic skin, cgi, 3d render, blurry, deformed hands,
watermark, text, low quality
orange skin, sunburned, fake tan, oversaturated orange are the direct counters to the most common golden hour failure. flat lighting, no shadows, overcast, harsh midday sun push the model toward the low, directional light you actually want. The negative prompt master list has more if a model keeps flattening the scene.
Settings: sampler, CFG, steps, resolution
| Setting | Value | Note |
|---|---|---|
| Sampler | DPM++ 2M Karras | Clean rim and flare rendering |
| CFG scale | 5 to 6 | High CFG oversaturates the orange, keep it low |
| Steps | 30 to 35 | Haze and flare need steps to render smoothly |
| Base resolution | 832×1216 | Portrait ratio for backlit subject |
| Upscale | 1.5x, denoise 0.3 | Preserves the glow gradient |
| Hires upscaler | 4x-UltraSharp | Keeps flare from getting muddy |
Golden hour is the look most likely to blow out into pure orange at high CFG, so keep it at 5 to 6. The CFG and sampler guide explains the saturation tradeoff.
Step-by-step workflow
- Set the scene and sun direction first. Decide where the sun is (behind, behind-left, side) and write that explicitly, since the rim depends on it.
- Generate at 832×1216 and batch several seeds. Pick the frame with a clear rim and a readable face, not the most orange one.
- If skin looks orange, add the orange tags to the negative and lower CFG by a point, then re-roll. Do not fix it by desaturating in post, because that kills the warm light too.
- Run ADetailer on the face at low denoise so the backlit face keeps detail rather than dissolving into glow.
- Optional color grade pass: a light img2img at 0.2 denoise or a post curve to push warmth into the highlights only, keeping shadows neutral so skin does not go orange.
Where golden hour breaks, and the fix
| Failure | Cause | Fix |
|---|---|---|
| Orange, sunburned skin | Warm applied to skin not light | Add orange skin to negative, lower CFG |
| Flat, dull, no direction | Missing sun direction and rim tags | Add low sun behind subject, rim light |
| No glow or flare | Missing atmosphere tags | Add hazy glow, sun flare, atmospheric haze |
| Subject is a black silhouette | Backlight too strong, no fill | Add sidelit face or soft fill light |
| Muddy haze after upscale | Wrong upscaler | Switch to 4x-UltraSharp at 0.3 denoise |
| Looks like a warm filter | Warm color without light direction | Rebuild prompt around direction, not color |
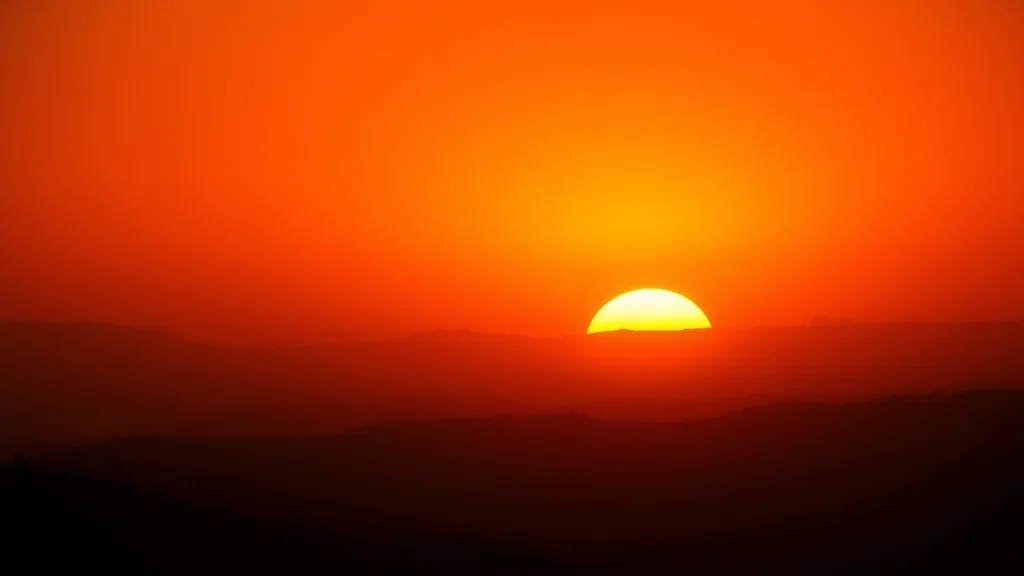
Backlight, sidelight, and front light
Golden hour is not one light direction, it is a family of them, and choosing deliberately changes the whole mood. Backlight, with the sun behind the subject, gives the strongest rim and the most glow but risks a silhouette, so it needs a fill tag. Sidelight, with the sun at 90 degrees, rakes across the face and body to reveal texture and shape, which is the most dimensional option. Front-and-slightly-low light bathes the subject in even warmth with soft shadows, flattering but less dramatic.
| Direction | Look | Watch out for |
|---|---|---|
| Backlight | Strong rim, halo, glow | Silhouette, needs fill |
| Sidelight | Textured, dimensional | Half the face in shadow |
| Front golden light | Even warm wash | Can go flat without a rim |
Name the direction explicitly (backlight, side lit, three quarter back light) rather than hoping the model guesses. The rim, the shadow length, and the glow all follow from where you place the sun, so this is the first decision to make, before color.
Controlling skin tone under warm light
The hardest part of golden hour is keeping skin natural while the light is warm. The physics of real golden hour is that warm light hits the skin but the camera and the eye still read the skin as skin, because the shadows and the subject’s own color anchor it. AI tends to collapse this and paint the whole subject orange. The fix is to warm the light and the highlights, not the base skin. Keep natural skin tone in the positive, push warmth into the light tags (warm sunlight, golden light, warm highlights), and hold orange skin, sunburned in the negative.
A neutral shadow side helps enormously. If the shadows stay cool or neutral while the lit side is warm, the brain reads the warmth as light rather than as a skin color. A soft cool fill or neutral shadows tag can rescue an image sliding toward orange. The color grading guide covers split-tone approaches where highlights go warm and shadows stay cool, which is exactly the golden hour signature.
Time of day and atmosphere nuance
Golden hour is not the same minute to minute. Early golden hour, just after the sun clears the horizon, is soft and pink with long shadows. Peak golden hour is rich amber. The last few minutes before sunset tip toward red and heavy haze. You can steer this with tags like soft pink dawn light, amber sunset, or deep red sunset, heavy haze. Atmospheric conditions matter too: dusty air, atmospheric haze, backlit dust gives the light something to scatter through, which is what produces the visible glow and volumetric shafts. Without any atmosphere, even correct backlight can look thin, so a haze tag is often the difference between a flat warm frame and a luminous one. The mood and atmosphere guide goes deeper on building that scattered-light feel.
Location and how it shapes the light
Where the scene is set changes how golden hour reads, because surroundings bounce and block the low sun. An open field or beach lets the light travel unobstructed, giving long clean shadows and a strong rim. A city street creates pockets of shadow and warm reflections off glass and pavement, which fill the shadow side and add interest. Water and sand act as giant reflectors, bouncing warm light back up into the face and softening the contrast, which is why beach golden hour is so flattering.
Describe the setting to get these effects: open field at sunset, low sun, city street golden hour, warm reflections, or beach at golden hour, sand reflecting warm light. The reflected fill from a bright environment is often what saves a backlit subject from becoming a silhouette, so a reflective setting can do the job of a fill light for free. Interiors work too: warm sunlight through window, golden light on skin gives a soft, directional indoor version of the look, with the window frame carving the light into a defined shape.
A quick golden hour build order
The reliable way to build this look is in a fixed order so you are never guessing. First, set the sun direction, since the rim and shadows depend on it. Second, add the rim and separation tag so the subject lifts off the background. Third, add atmosphere (haze, dust, glow) so the light becomes visible. Fourth, set the color character with a single warm tag on the light, not the skin. Fifth, add a fill or reflective setting so the shadow side stays open. Sixth, lower CFG to protect against the orange skin blowout.
Following that order every time turns golden hour from a coin flip into a repeatable recipe. Most failed golden hour images skip one of these steps: they nail the warm color but forget the direction, or add the rim but no atmosphere, and the result looks half finished. When you run the full sequence, the frame gets the direction, the glow, the correct skin, and the open shadows all at once, which is what real golden hour photographs have. From there you can start breaking the rules deliberately for effect, but learn the full build first.
Reading golden hour in reference photos
A fast way to improve is to study real golden hour photographs and name what you see, then translate it into tags. Look at where the sun sits relative to the subject, which tells you the light direction to write. Look at the shadow side of the face: is it open and warm from a reflective setting, or deep and cool? That tells you whether to add a fill. Look at the highlights on hair and shoulders, which is the rim you need to specify. Look at whether the air is clear or hazy, which decides your atmosphere tag.
Doing this for even a handful of images builds an instinct for the difference between a warm color and actual golden light. The recurring lesson is that the good photographs almost never rely on color alone: there is always a direction, a rim, and some atmosphere doing the work, with the warmth sitting on top. Once you can decode a reference into those components, you can rebuild any golden hour mood you like in a prompt instead of hoping the model stumbles onto it.
When to level up
Once you can produce a clean rim and a warm glow without orange skin, start shaping the light. Add a soft fill light or reflector tag to open the shadow side of the face so the subject is not lost against a bright background. Push the flare with anamorphic lens flare for a cinematic streak, or pull it back for a subtle, natural bloom. Combine golden hour with a shallow aperture for a warm, backlit portrait where the background dissolves into glowing bokeh, which is one of the most photographic looks you can build. Once the direction of light is under your control, every other lighting look, from window light to studio strobe, gets easier to reason about.
Frequently asked questions
Why does my golden hour AI photo have orange skin?
You applied warmth to the skin instead of the light. Golden hour tints the light, not the subject. Add orange skin and fake tan to the negative, lower CFG a point, and rely on backlight and glow tags so warmth sits in the highlights.
What is the key tag that separates golden hour from a warm filter?
Light direction. Tags like low sun behind subject and rim light on hair and shoulders create the directional backlight and bright edge that define golden hour. Warm color alone with no direction just looks like an Instagram filter.
How do I keep the face visible when the sun is behind the subject?
Add sidelit face or a soft fill light tag so the front of the face stays readable. Without it, a strong backlight turns the subject into a silhouette, since the model exposes for the bright background.
Why is my golden hour light flat and dull?
You are missing the sun direction, rim, and atmosphere tags. Add low sun, rim light, hazy glow, and long soft shadows. Also add flat lighting and overcast to the negative so the model stops rendering an even, directionless scene.
Which checkpoint handles warm backlight best?
epiCRealism and RealVisXL both render warm skin under colored light without an orange cast and produce a clean rim. FLUX has the best flare and rim physics but is slower, so the SDXL pair is the practical choice.
How do I add sun flare without it looking fake?
Use sun flare and lens flare with hazy glow and atmospheric haze so the flare sits inside real scattered light. Keep steps at 30 or more so the bloom renders smoothly, and avoid overweighting the flare tag, which produces a hard, pasted streak.
Can I combine golden hour with a blurred background?
Yes, and it is one of the best-looking combinations. Add a shallow aperture tag like 85mm f/1.8 so the warm, hazy background melts into glowing bokeh behind the rim-lit subject, which reads as a genuine backlit portrait.
Should I fix orange skin in post instead?
No. Desaturating in post kills the warm light along with the orange skin, leaving a flat result. Fix it at generation with the negative tags and lower CFG so the light stays warm while the skin tone stays natural.
Related scene how-tos: