To make a believable outdoor nature NSFW AI scene, build a forest clearing or field: tall trees, moss, wildflowers, grass, and a little haze. Light it with dappled sunlight filtering through the foliage and god rays. Place the subject on the ground or against a tree so she is grounded, then fix mushy leaves, repeating foliage, and floating subjects in post.
Why a nature scene is easier and trickier than it looks
An outdoor nature scene is forgiving in the ways a city or a bathroom is not. There are no straight lines to warp, no tile grids to melt, no mirrors to break. Organic shapes hide a lot of the model’s mistakes, so a forest clearing or a sunlit field is one of the friendlier environments to attempt. That is the good news.
The trickier part is that nature has its own failure modes. Foliage turns to mush when there is too much of it, so distant trees and undergrowth become a smeared green wall with no readable detail. The model also loves to repeat: the same fern, the same flower, the same tree tiled across the frame in an obvious pattern. And because the ground in a clearing is soft and uneven, subjects float above the grass instead of pressing into it. On top of that, the thing that makes a nature scene magical, the dappled light and god rays, is exactly the thing the model renders inconsistently, so the shafts land in the wrong places or vanish entirely.
The key distinction from a beach scene is the enclosure and the light. A beach is open, bright, and horizontal, dominated by sky and water. A forest clearing is enclosed, green, and vertical, dominated by trees and dappled shade. If you want a lush woodland rather than a shoreline, you build the trees, the undergrowth, and the filtered light deliberately. This guide covers the props, the lighting, the staging, a copy paste prompt, and the specific fixes for mushy leaves, repeating foliage, and floating subjects.
For a general grounding in environment prompting, the setting prompt tags guide is a good starting point.

The setting and prop prompt tags
A nature scene reads as woodland or meadow through a handful of elements: tall trees, undergrowth (moss, ferns, wildflowers), grass, and atmospheric elements like haze and god rays. Lead with the clearing or field, then the vegetation, then the light, then the atmosphere.
Here is a tag table to pull from. Choose a few per row rather than stacking everything.
| Element | Strong prompt tags |
|---|---|
| The place | forest clearing, sunlit meadow, wildflower field, woodland glade, grassy clearing in the woods |
| Trees | tall trees, dense forest, birch trunks, pine canopy, leafy branches overhead |
| Undergrowth | soft moss, ferns, wildflowers, tall grass, fallen leaves, mossy log |
| Ground | grassy ground, mossy forest floor, wildflowers underfoot, soft earth |
| Light | dappled sunlight, sunlight through the leaves, god rays, light filtering through canopy, warm sun spots |
| Atmosphere | soft morning haze, misty forest air, gentle depth haze, warm golden atmosphere |
The tokens that set the identity are “forest clearing” (or “sunlit meadow”) and “dappled sunlight through the leaves.” The clearing gives you an open pocket for the subject inside the enclosure of trees, and the dappled light is the signature of a woodland scene. The second most valuable token is “soft morning haze,” which gives the god rays something to travel through so the shafts become visible.
For the emotional register, the mood and atmosphere prompt tags add words like “serene,” “natural,” and “dreamy” that suit a sunlit glade.
A useful trick is to specify the type of forest, because “forest” alone is vague and the model averages toward a generic green blur. A birch grove with pale white trunks reads very differently from a dense pine forest or an oak woodland with a broad leafy canopy. Naming the trees (“birch grove,” “tall pine forest,” “oak woodland”) gives the model a concrete structure to build, which reduces the mushy averaged look. The same applies to the ground: a moss covered forest floor, a carpet of ferns, and a wildflower meadow are three different scenes, so pick one and commit rather than stacking all three, which tends to produce a cluttered, unfocused undergrowth.
How to light a forest clearing
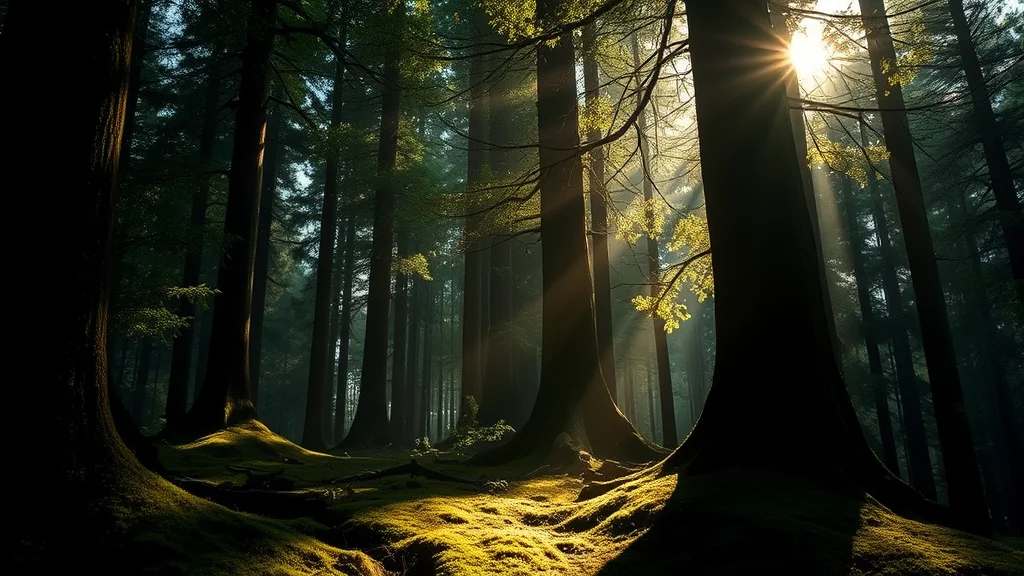
The defining light is dappled sunlight: hard sun broken into soft patches by the canopy above. This gives a mix of bright warm sun spots and cool green shade across the subject and the ground, which is unmistakably woodland. Prompt “dappled sunlight,” “sunlight filtering through the leaves,” and “warm sun spots on skin.”
The magical addition is god rays: visible shafts of sunlight cutting down through the canopy. These only appear if the air has something to scatter through, so pair them with haze. Prompt “god rays,” “volumetric light shafts through the trees,” and “soft morning haze.” Without the haze, the god rays flatten out and vanish.
Because dappled light is a mix of hard sun and soft shade, the scene has natural contrast that flatters skin and reads as real outdoor light. This overlaps heavily with a golden hour approach when the sun is low, and it is essentially a naturally backlit setup when the god rays come from behind the subject. The general lighting prompt reference has phrasing for filtered natural light.
For grading, a forest wants warm sun spots against cool green shade, a natural warm and cool split. The color grading prompt tags help push toward that lush, slightly golden woodland look without oversaturating the greens into neon.
The time of day changes the whole character of a clearing. Midday sun through a dense canopy gives high contrast dappling with sharp bright spots, which is punchy but can be harsh on skin. Early morning or late afternoon sun comes in low and sideways, raking across the clearing, and that is when god rays are strongest and the light is warmest and most flattering. If you want the dreamy, glowing woodland look, aim for that low sun and prompt it explicitly with “low morning sun” or “late afternoon golden light through the trees.” The low angle also lengthens shadows across the grass, which adds depth and helps ground the subject, so it solves two problems at once.
Staging, subject placement, and depth
Ground the subject deliberately, because floating is the number one nature failure. Place her lying in the grass, kneeling on the moss, seated against a tree trunk, or standing in the clearing with feet clearly in the grass. Contact with the ground or a trunk gives the model an anchor so the subject presses into the scene instead of hovering above it. If she is lying down, prompt the grass and flowers bending around the body.
Build depth in three layers. Foreground is the near grass, flowers, or a mossy log closest to camera. Midground is the subject in the clearing. Background is the receding trees falling into soft focus and haze. This layering is what turns a flat green wall into a deep, believable woodland. A shallow depth of field softens the far foliage, which conveniently hides the mushy leaf problem, similar to a bokeh photo build where the background dissolves into soft light.
For angle, eye level or a low angle looking slightly up at the subject with god rays behind works beautifully and lets the light shafts rake across the frame. A high angle looking down at a subject lying in wildflowers is also strong. The camera angle prompt tags list the tokens. Keep the subject an original adult character in a private, natural setting.
A full copy paste example prompt
Here is a complete positive and negative block for a sunlit forest clearing.
Positive:
photorealistic, an adult woman reclining in the grass in a sunlit forest clearing, tall trees and leafy canopy overhead, soft moss and wildflowers around her, dappled sunlight filtering through the leaves, warm sun spots on skin, god rays through the trees, soft morning haze, grass and flowers bending around the body, serene natural dreamy mood, shallow depth of field, 85mm lens look, detailed skin texture, lush warm and cool color grade, foliage in soft focus behind

Negative:
mushy leaves, smeared foliage, repeating trees, tiled flowers, floating subject, hovering above grass, flat green wall, neon oversaturated green, harsh flat lighting, extra limbs, deformed hands, watermark, text, lowres, cartoon, plastic skin, blurry mush
Swap the subject for an adult man or a couple, and change the season or flower type to taste. If the character must stay identical across several nature shots, run the set through a consistent photo set workflow or one of the character consistency techniques.
Sampler, CFG, and checkpoint notes
A scene full of fine foliage detail and soft light rewards a sampler that resolves detail without turning it to noise. DPM++ 2M Karras at 30 to 35 steps is a reliable baseline. If the foliage looks noisy or crunchy, DPM++ SDE Karras smooths the organic textures and the haze.
Keep CFG moderate, around 5 to 7. High CFG pushes the greens into neon and hardens the dappled light into harsh blotches, killing the natural feel. Lower CFG keeps the greens believable and the light soft. The CFG and sampler settings guide has the full breakdown.
For the checkpoint, a realism model gives the best skin under dappled light and the most believable foliage. epiCRealism and RealVisXL both handle outdoor natural light and greenery well. For Pony based anatomy control, CyberRealistic Pony is solid. See the wider checkpoint roundup for more.
| Setting | Recommended start | Notes |
|---|---|---|
| Sampler | DPM++ 2M Karras | SDE Karras smooths foliage and haze |
| Steps | 30 to 35 | Higher steps help fine leaf detail |
| CFG | 5 to 7 | Low CFG keeps greens natural, not neon |
| Resolution | 832×1216 portrait | Upscale after rendering |
| Checkpoint | epiCRealism or RealVisXL | Realism model for skin plus foliage |
Where it breaks and how to fix it
Four failures dominate nature renders. Here is how to catch and fix each.
Mushy, smeared foliage
Distant trees and undergrowth turn into a smeared green wall with no readable leaves. This is the model failing at dense fine detail far from camera. The best prevention is a shallow depth of field so the far foliage is intentionally soft, which reads as natural background blur rather than failure. In the prompt, add “foliage in soft focus behind.” When near foliage is still mushy, inpaint a few sharp leaves and branches in the important areas to restore detail, or upscale the image to let the model regenerate leaf texture. The photo editing workflow covers targeted detail passes.
Repeating, tiled foliage
The same fern, flower, or tree repeats in an obvious grid across the frame. This is the model tiling a pattern instead of varying it. Reduce it by prompting variety: “varied wildflowers,” “mixed undergrowth,” “different trees,” and by using a shallow depth of field so repetition in the soft background is less visible. When an obvious repeat survives, inpaint over the duplicated element to break the pattern, or paint in a different plant. Variety tokens plus a soft background handle most of it.
Floating subject
The subject hovers above the grass instead of pressing into it. The ground contact is missing. Fix it by prompting explicit contact: “lying in the grass,” “grass and flowers bending around the body,” “pressed into the moss,” or “feet in the grass.” If she still floats, inpaint the contact points: add grass blades and flowers overlapping the body where it meets the ground, and add a soft contact shadow beneath her so she sits in the scene. This grounding shadow is the fastest fix.
Harsh, blotchy dappled light
Sometimes the dappled light comes out as harsh white blotches with hard edges that look more like paint splatter than sunlight through leaves. This usually means the light is too contrasty. Lower the CFG so the transitions soften, and shift toward a lower sun angle where the dappling is gentler. In post, you can soften the worst blotches with a light local blur in your editor so the sun spots feather into the shade naturally. The goal is soft edged pools of warm light, not hard clipped white patches. Adding “soft dappled light” rather than just “dappled light” nudges the model toward gentler patches.
Missing or wrong god rays
The god rays land in the wrong places, look flat, or vanish. God rays need haze to be visible and a clear light direction. Strengthen “god rays,” “volumetric light shafts,” and “soft morning haze,” and make sure the sun direction in the prompt is consistent (for example, backlight from behind the trees). If the shafts still fail, generate a hazier variant and blend it, or paint soft light shafts on a screen layer along the sun direction so they fall naturally through the canopy. The get better results guide has more on adding atmosphere, and if the whole frame comes out soft, run the blurry image fix.
Conclusion
An outdoor nature NSFW scene is one of the more forgiving environments, but it has its own traps. Build the forest clearing or meadow with tall trees and varied undergrowth, and light it with dappled sunlight plus god rays through haze for that magical woodland feel. Keep the far foliage soft with a shallow depth of field so mushy leaves and repeats hide in the blur, and ground the subject firmly against the earth or a tree with contact shadows so nothing floats. Keep CFG low so the greens stay natural rather than neon, and inpaint any smeared foliage, obvious repeats, or missing god rays rather than rerolling. Do that and your clearing will feel lush, deep, and real. For the open shoreline alternative, compare with the beach scene guide, and for the urban outdoor version, the rooftop scene guide.
Frequently asked questions
How do I stop the foliage from turning to mush?
Distant foliage smears because the model struggles with dense fine detail far from camera. Use a shallow depth of field so the far foliage is intentionally soft, which reads as natural background blur rather than failure, and add foliage in soft focus behind to the prompt. When near foliage is still mushy, inpaint a few sharp leaves in the important areas or upscale the image to regenerate leaf texture.
Why do the same trees and flowers keep repeating in my scene?
The model tiles a pattern instead of varying it. Prompt variety with tokens like varied wildflowers, mixed undergrowth, and different trees, and use a shallow depth of field so repetition in the soft background is less visible. When an obvious repeat survives, inpaint over the duplicated element to break the pattern or paint in a different plant.
How do I keep the subject from floating above the grass?
Ground contact is missing. Prompt explicit contact such as lying in the grass, grass and flowers bending around the body, or feet in the grass. If she still floats, inpaint the contact points by adding grass blades and flowers overlapping the body where it meets the ground, and add a soft contact shadow beneath her. That grounding shadow is the fastest fix.
How do I get visible god rays through the trees?
God rays need haze to scatter through and a clear light direction. Prompt god rays, volumetric light shafts, and soft morning haze, and keep the sun direction consistent, such as backlight from behind the trees. If the shafts still fail, generate a hazier variant and blend it, or paint soft light shafts on a screen layer along the sun direction so they fall naturally through the canopy.
How is a forest scene different from a beach scene?
A beach is open, bright, and horizontal, dominated by sky and water. A forest clearing is enclosed, green, and vertical, dominated by trees and dappled shade. To get woodland rather than shoreline, lead with forest clearing or sunlit meadow, build the trees and undergrowth, and use dappled sunlight through the leaves instead of open sky and a flat horizon.
What lighting makes a forest scene look natural?
Dappled sunlight is the signature: hard sun broken into soft patches by the canopy, giving warm sun spots against cool green shade. Prompt dappled sunlight, sunlight filtering through the leaves, and warm sun spots on skin. Add god rays and soft morning haze for the magical shafts. The natural mix of sun and shade flatters skin and reads as real outdoor light.
Which checkpoint is best for an outdoor nature scene?
A realism model gives the best skin under dappled light and the most believable foliage. EpiCRealism and RealVisXL both handle outdoor natural light and greenery well. For Pony based anatomy control, CyberRealistic Pony is solid. Avoid stylized checkpoints since they tend to push greens into neon and flatten the natural dappled light.
What CFG keeps the greens from looking neon?
Keep CFG moderate, around 5 to 7. High CFG pushes greens into oversaturated neon and hardens the dappled light into harsh blotches, killing the natural feel. Lower CFG keeps the greens believable and the light soft. Pair it with DPM++ 2M Karras at 30 to 35 steps, and switch to SDE Karras if the foliage or haze looks noisy.